Orchids are cherished for their beauty and delicate nature, but they can sometimes be tricky to grow, especially when it comes to encouraging new roots and leaves. One helpful technique to boost your orchid’s growth is soaking the orchid leaves in water. This simple process encourages strong, healthy roots and leaves. Here’s what happens and how you can do it.
Preparing the Orchid for Soaking in Water

Growing new roots and leaves for your orchid is a straightforward process, but it requires careful attention. Here’s how to get started:
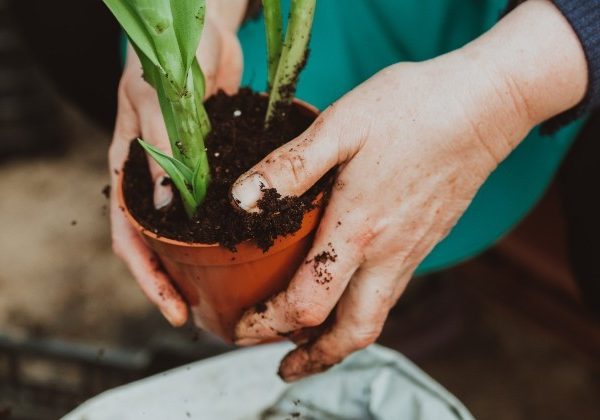
- Remove the Soil and Damaged Roots: Begin by carefully removing the soil from your orchid and cutting away any damaged roots.
- Disinfect the Leaves: To prevent diseases, prepare a natural disinfecting solution by crushing a small garlic clove and adding it to half a liter of water. Filter the water to separate the garlic pieces. Use a cotton pad to rub the garlic-infused water onto the orchid leaves.
- Soak the Roots: Immerse the orchid roots in a glass of the garlic-infused water for 30 minutes. This will disinfect the roots and prepare them for growth.
Setting Up the Glass of Water for Orchid Leaves
Once the leaves are disinfected and the roots have been soaked:
- Dry the Plant: Gently dry the orchid after soaking.
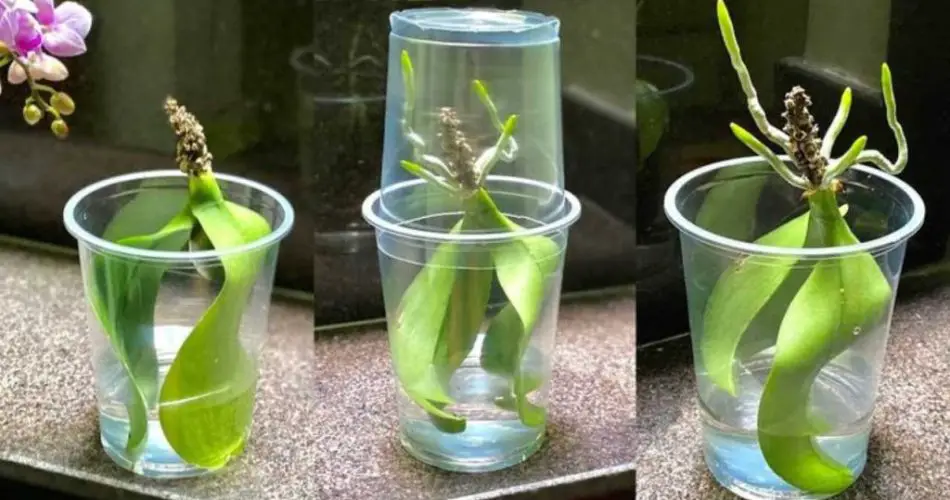
- Place in a Plastic Cup: Turn the orchid upside down and place it in a plastic cup. Before doing this, make sure to punch small holes in the top of the cup. These holes will allow the plant to breathe and help retain moisture at the base of the plant.
- Add Water: Fill the glass with just enough tap water to cover the bottom portion of the leaves—be sure not to fill it completely. Cover the glass with another smaller glass to create a humid environment for the plant.
- Leave the Orchid to Grow: Leave the orchid in this setup for 45 days.
After 45 Days: The Results
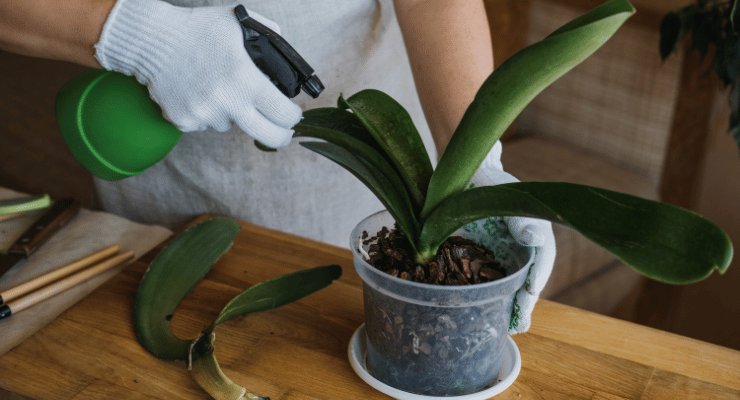
After 45 days, the roots of your orchid will have become much stronger. To maintain their health, spray the roots with tap water every 3 days. By the end of 75 days, the roots will be robust and healthy, and your orchid will be ready for transplantation.
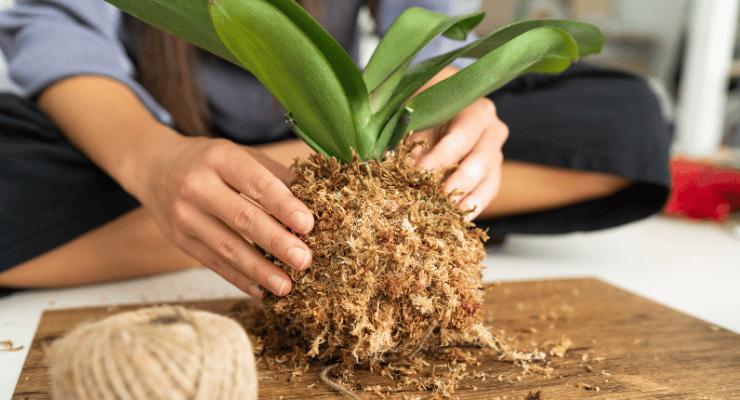
Before transplanting, soak the plant again in the remaining garlic water for 30 minutes to further promote its health. Then, carefully transplant it into a new pot filled with pine bark, which ensures proper drainage.
Why This Method Works for Orchids
This water-soaking technique works for several reasons:
- Stimulates Root Growth: The water-soaking process encourages new root development, which is crucial for the orchid’s survival and growth.
- Natural Disinfectant: Garlic acts as a natural disinfectant, preventing fungal or bacterial infections that could harm the plant.
- Humidity and Breathing: The plastic cup with holes allows the orchid to breathe while also retaining the humidity necessary for its tropical growth environment.
- Healthy Roots for Nutrient Absorption: Healthy, strong roots enable the orchid to absorb the nutrients it needs for continued growth.
This method is particularly useful for orchids with damaged roots or those growing in unsuitable soil. By soaking the leaves and roots in water, the plant can regenerate and develop in a healthier way.
- Prevents Infection: The garlic water helps prevent infections, ensuring that the orchid stays free from diseases that might compromise its growth.
- Maintains Humidity: Regular misting helps keep the surrounding environment humid, which is ideal for orchids, as they thrive in tropical, humid climates.
- Pine Bark for Drainage: Finally, transplanting the orchid into a pot with pine bark ensures proper water drainage and air circulation around the roots, keeping the plant in top health.
By following this simple yet effective technique, your orchid will grow strong, healthy roots and leaves, allowing it to thrive for years to come.