Orchids are colorful, varied, and easy to grow, making them a favorite among flower enthusiasts. These tropical beauties bring vibrant charm to our homes. Did you know that you can propagate your orchid from a leaf? In this article, we’ll show you how!

Can You Take a Cutting from an Orchid Leaf?
To propagate your orchids, you can use leaf cuttings. This method typically involves taking a leaf from the mother plant to grow an identical plant. However, for orchids, it’s essential to include a piece of the attached stem with the leaf, as this is the only part containing cells that promote regrowth.
How to Propagate an Orchid from a Leaf

Before you begin, note that propagating orchids from a leaf is a long and complex process; roots can take over a year to develop! Here’s how to take cuttings from your orchid:
- Select a Healthy Orchid: Use sterilized, sharp scissors or pruning shears to remove a healthy leaf with a small piece of stem.
- Air Dry the Cutting: Let your cutting air dry for about 8 hours.
- Apply Rooting Product: Use a rooting hormone and apply a small amount to the cutting.
- Prepare Activated Carbon Solution: Dilute activated carbon in water. This helps prevent diseases and promotes beneficial bacteria for root development.
- Dip the Cutting: Immerse the leaf and stem in the activated carbon solution.
- Plant the Cutting: Finally, plant your cutting in the soil, ensuring the soil is free from mold or decayed plant matter.
Planting an Orchid Cutting
Using a rooting agent is crucial for successful propagation. It stimulates healthy root growth. If you prefer natural options, consider using lentils, which contain plant hormones like auxin that promote root development. Here’s how to make your own natural rooting agent:
- Soak 100 grams of lentils in 1 liter of water.
- Cover the container and let it sit for a few hours.
- Strain the liquid into another container and refrigerate it.
- Cover the lentils with a towel and keep them in a dark place overnight.
- The next day, soak the lentils in the reserved water for a few minutes.
- Repeat daily until the lentils germinate.
- Blend the germinated lentils with the refrigerated water until smooth.
- Strain to obtain a liquid and dilute it with 10 cups of water.
- Dip your cuttings in this mixture before planting.
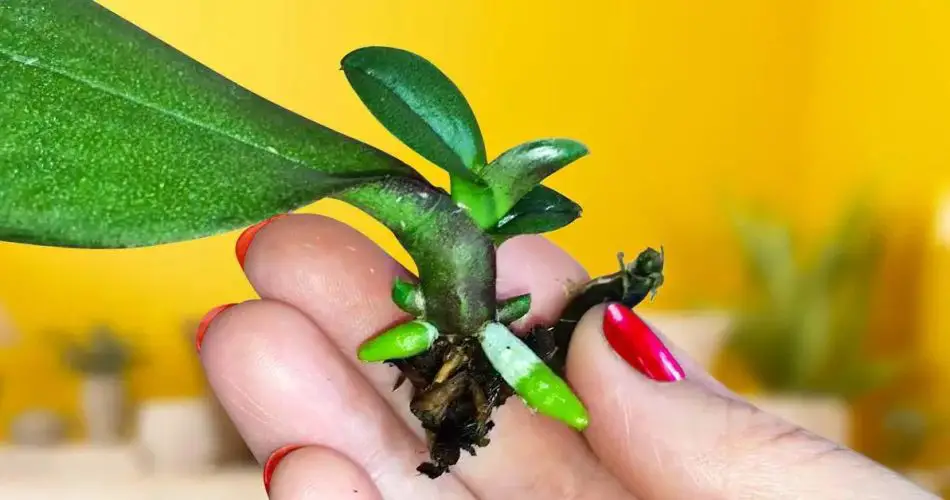
Keikis: A Natural Way to Multiply Orchids

Certain orchid varieties, like phalaenopsis and dendrobium, develop keikis (Hawaiian for “baby”). These shoots grow on faded flower stems and resemble miniature versions of the mother plant.
- Allow the keiki to grow a few more leaves and establish a healthy root system.
- When ready, carefully separate it from the mother plant using clean tools.
- Plant the keiki in a pot with the same substrate as the mother plant, and it will continue to thrive.
Orchid Care Tips
Why Use Baking Soda on Orchids?

Baking soda is a versatile product that acts as a natural fertilizer for your orchids. To use it, dilute 1 tablespoon in 1 liter of room-temperature water and water your plant. This will stimulate flowering for beautiful blooms.
Important: Do not apply baking soda directly to the orchids or substrate, as its salt content can be harmful.
Additional Natural Fertilizers
Other natural fertilizers you can use for your orchids include:
- Coffee grounds
- Banana peels
- Eggshells
- Starchy cooking water (from potatoes or pasta)
By following these steps to propagate your orchid, you can enjoy an abundance of these beautiful plants. With the right care, you’ll never run out of orchid beauty!